'Contemporary Rustic' Christmas Breakfast Table
by Louise
(United Kingdom)

'Contemporary rustic' Christmas breakfast table


|


|


|


|
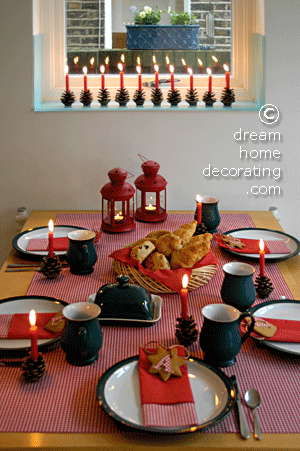
Having got a new kitchen recently, I decided that a special Christmas breakfast would be just the thing, with a view to the garden through our new large glass doors. I chose a rustic theme to go with the winterly garden views.
For our Christmas breakfast I decided to go with red-and-white gingham, handmade pine-cone candle holders and personalized cookies as place tags. I assumed it would all be very quick and easy to create - three, four hours and you're in business. That was my theory. In reality, it took me two entire afternoons, but it was worth it.
This is how I made the candle holders:
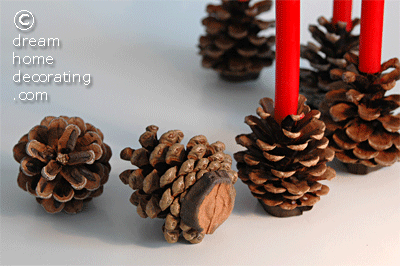
Step 1: Break or cut the top 2-3 scales out of a well dried, open cone to make space for a candle. (I used garden secateurs for this and made a right mess. It took me 3 cones to get the hang of it. So you may want to start with the least promising cones.)
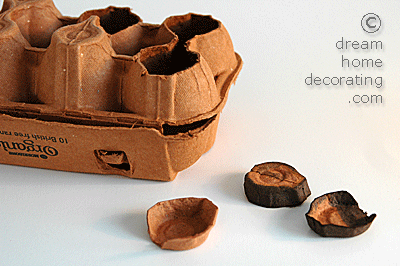
Step 2: To help the cone stand upright, you need to give it some kind of 'shoe'. Bottle caps are an obvious choice, but I hadn't thought to collect any. So I cut the bottoms out of an egg crate (with a craft knife) and painted them dark brown.
Step 3: Glue the cone into the 'shoe'. Then drip hot candle wax into the tip of the cone and set a chime candle (Christmas tree candle) into the hot wax. Rotate the cone a few times to see if the candle stands straight.
I made the cut-out initials from thick(ish) card and the top (printed) layer of a paper napkin.
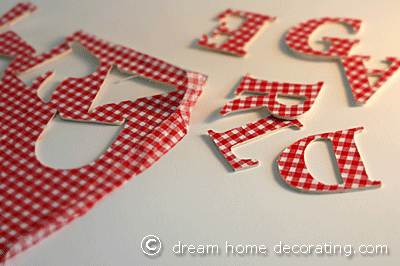
Step 1: Peel the top layer off a paper napkin and glue it onto the card. However, I suggest you don't do what I did, which was to brush the card all over with white craft glue. The napkin tissue is so fine, it reacted instantly to the moisture of the glue and started to pucker.
I decided to go with the resulting 'seersucker' look (it complemented the rustic approach), but you're likely to get much nicer, smoother results with spray glue. It is much drier.
Step 2: Print out initials in a font you like, and trace them onto the prepared card. Cut them out of the card with a craft knife.
Step 3: Using ribbon or twine, tie the initial to a cookie that has a hole in it (my cookies were store bought, I'm not much of a baker) and place it on a napkin or directly onto the plate.
Merry Christmas!
Note: This entry was 1st runner-up in our Christmas Table Settings Contest 2012!
Comments for 'Contemporary Rustic' Christmas Breakfast Table
|
||
|
||
|
||
|
||
|
||
|
||