Easter Egg Designs:
How To Decorate Easter Eggs
With Dye & Masking Tape
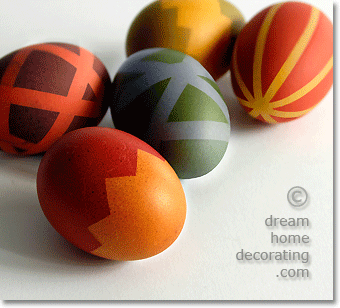
These Easter egg designs are all two-tone/two-color Easter egg ideas. Make them with white or with brown eggs (brown ones pictured here!) No fancy gizmos needed, just the following:
- masking tape
- craft knife
- scissors
- (metal) ruler
- cutting mat (alternatively a flat, heavy duty plastic sheet) to pre-cut the masking tape
- Easter egg dyeing supplies (list & instructions here!)
How To Create These Easter Egg Designs:

1. Zig-zag Easter eggs; 2. 'Wrapped' egg designs; 3. 'Star' Easter egg pattern.
(This page also contains a few examples of Easter egg designs that didn't work!)
Easter Egg Designs, #1
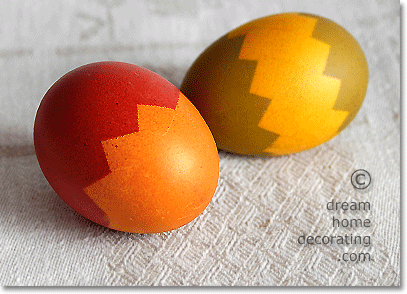
There are two ways to create these Easter egg patterns.
A
The first method is to mask off the pattern before you start the dyeing process. Make sure the strips overlap, and burnish the edges with a fingernail so the dye cannot seep in!
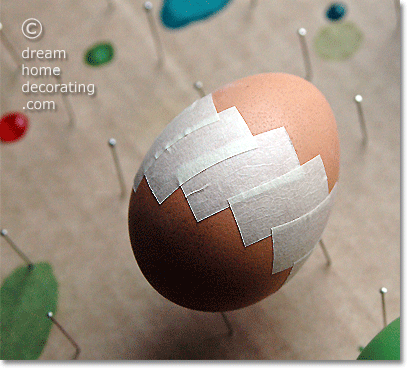
Then you dye the egg in the darker color first. Let the egg dry, remove the masking tape, and overdye in a lighter color/tone. (For this egg I used first green, then yellow.)
B
The second method is to start with an egg that has been pre-dyed in a light color (in this case yellow/orange). You mask off the areas that are to stay light, and dye the exposed parts to a deeper shade:
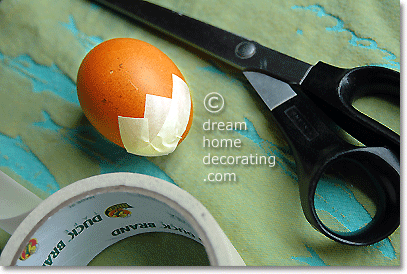
Create the zig-zag pattern with short strips of masking tape that you stick diagonally across one end of the egg. Let them go slightly over the top: this helps seal off the entire area. (If in doubt, add more masking tape!)
Once you've completed the design, create a hanger loop around a pencil (or similar), and hang the egg into dye of a darker color (I used deep red as the second dye). Make sure only the zig-zag part of the mask is immmersed in the dye:
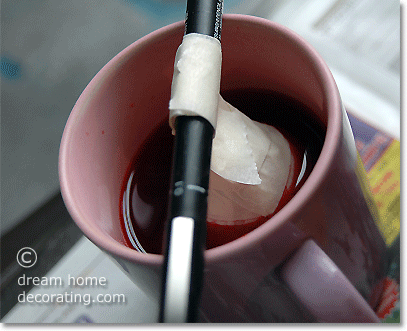
As long as you're using chicken eggs, I don't think it matters whether you use method A or B for these Easter egg designs. I've found that both work equally well. With duck eggs, though, it's a different story!
I love creating these Easter egg designs with brown eggs rather than white - the look reminds me of the vintage wooden toys I used to play with when I grew up in Germany!
Easter Egg Designs, #2
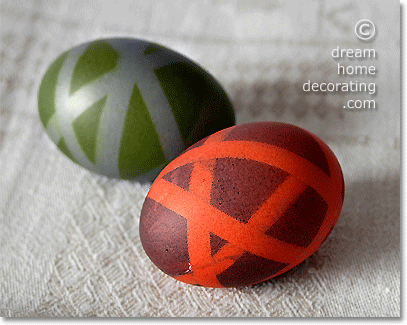
For this 'random weave' Easter egg pattern, you need to pre-cut your masking tape to a width of about ½ cm / 0.2 in.
To cut masking-tape strips:
Stick a length of masking tape down on a cutting mat or heavy plastic sheet, making sure it overlaps either end. Then slice it into narrow strips using a craft knife. Use the overlap to lift the strips off the cutting mat.
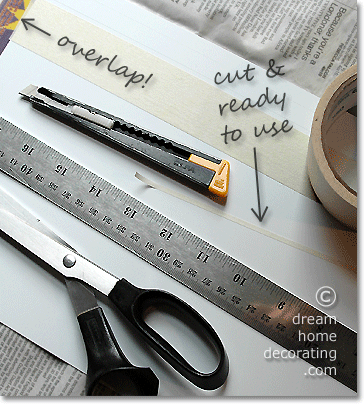
For easier handling, cut each strip to a length that feels comfortable and doesn't curl up too much. Just stick the remainder back onto the board until you're ready to use it.
Important: When you start your Easter egg pattern, press one end of masking tape down on the eggshell and hold it there while pulling the tape taut to create your design. Do the same with all further strips you use, 'stitching' the pattern together. The tension will ensure you get a nice sealed edge!
Here's the red/maroon egg in the making: The masking tape was removed after the first dye bath (blue) and before the second (bright red). You'd expect blue and red to mix into a nice purple, but I've found that with egg coloring this doesn't always work. I've never achieved anything beyond a thoroughly murky maroon.
(See the Color Wheel Chart for more info about mixing colors.)
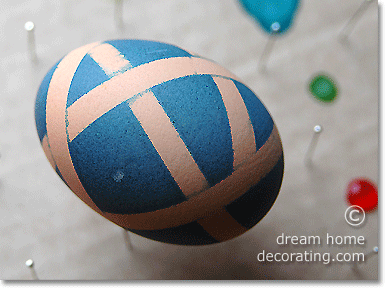
The other egg in this batch was first dyed green, then overdyed with blue.
Easter Egg Designs, #3
This Easter egg pattern was done in the same technique as #2, but with narrower strips of masking tape (3mm / 0.1in).
Of all the Easter egg designs on this page, I'd say this pattern is the most foolproof, because it has an easy regular shape, and the strips of masking tape hold each other in place.
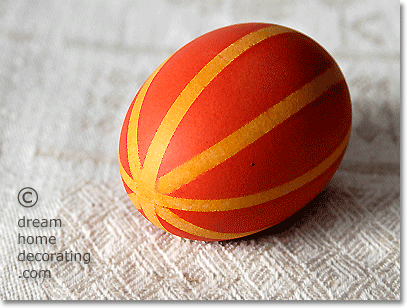
Instead of starting with a pre-dyed egg, you could mask the pattern onto an undyed egg. In this case, you would dye in a dark color first, allow to dry, remove the tape and overdye with a lighter tone.
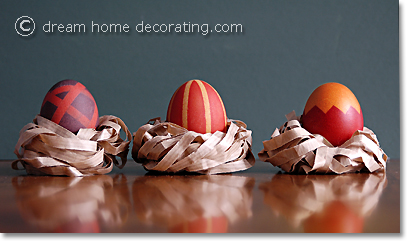
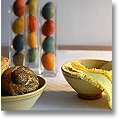
Pattern-dyed brown Easter eggs in paper nests
Learn how to make paper Easter nests here!
Easter Egg Designs Gone Wrong
Easter egg pattern #3 was part of a 'three-egg experiment' (one chicken egg, two duck eggs), and it was the only design that actually came out looking presentable.
Here's the entire batch, just before things started to go belly up:
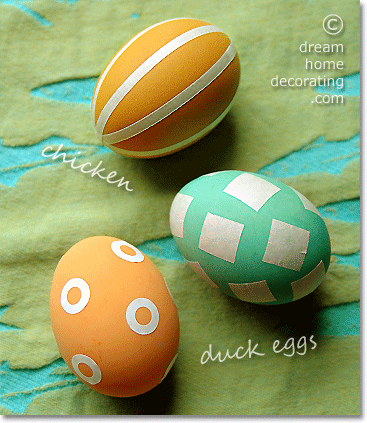
On the green duck egg ...
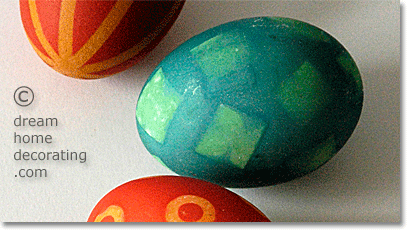
... almost half of the square patches came off in the second dye vat. My theory is that the first layer of dye reacted with the new water/vinegar mix, which weakened the glue bond of the masking tape. (However, none of the pre-dyed chicken eggs had this problem!)
Anyway, here's the sad result:
On the orange duck egg ...
... I tried out some ring reinforcement stickers for a sweet 'polka-dotty' look. These stickers are not as flexible as masking tape, so it was almost impossible to seal all the edges properly. You can see how the dye bled under the rim.
Also, unlike masking tape, these rings are meant to stick permanently, so their glue is much stronger. When I picked them off with tweezers after the second dye bath, they took some of the dye away with them:
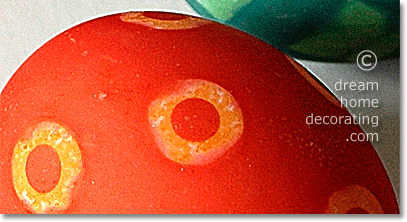
Reinforcement rings would probably work much better if you used them on white eggshells and just dyed once, because then the glue would not take off any color.
And that's all I have to say about that ;-)
For more Easter decorating ideas and tutorials, Click A Pic:
Easter Craft Ideas:
Easter Table Decorating:
Yet to find the information you're looking for? Type a word or phrase into the search box below:

 >
>


New! Comments
Have your say about what you just read! Leave me a comment in the box below.